
Jobma Integrates with Rippling
This guide aims to assist you in establishing the integration between Jobma and Rippling, providing step-by-step instructions for setup and usage.
To begin, log in to both your Jobma and Rippling accounts.
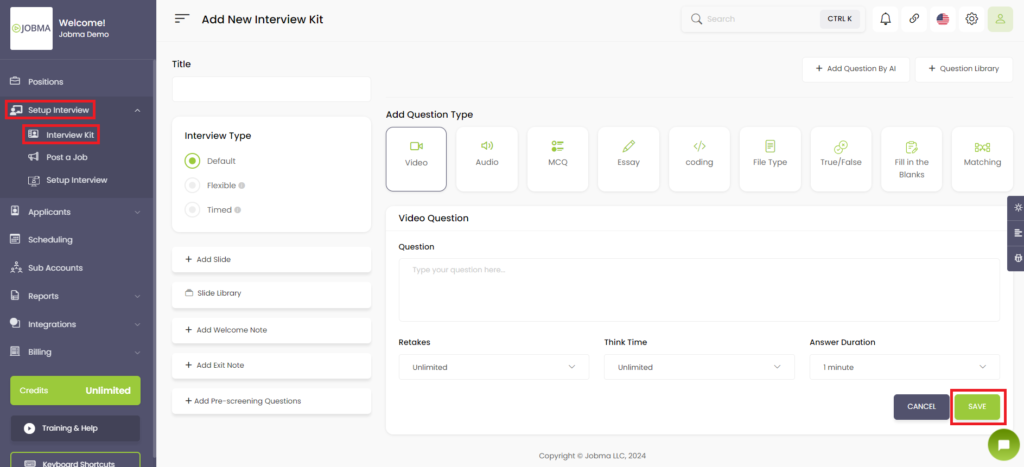
Step 1
Within your Jobma account, the first step involves creating an interview kit. Navigate to Set up an Interview > Interview Kit, add your desired questions, and click the Save button.
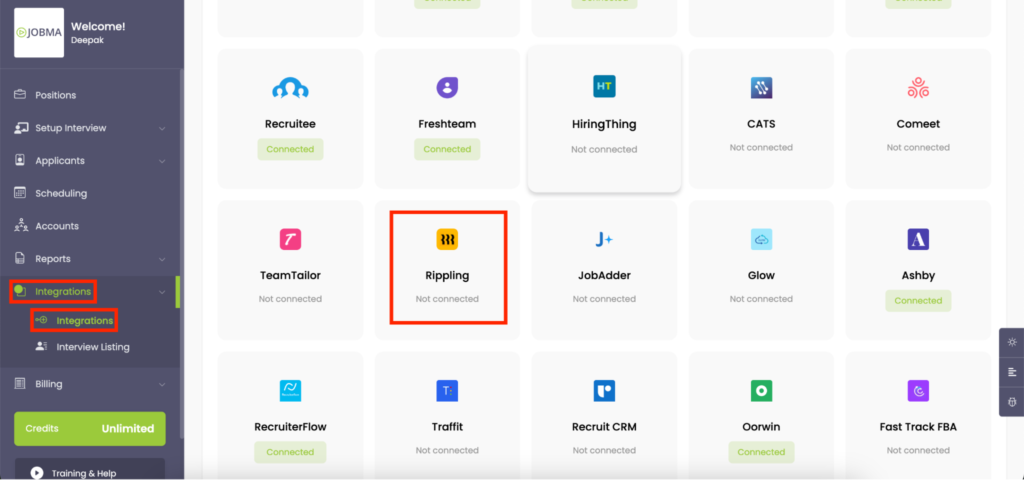
Step 2
Now, in your Jobma account, go to the Integrations located on the left-hand side. Click on Integrations, then select Rippling from the list.
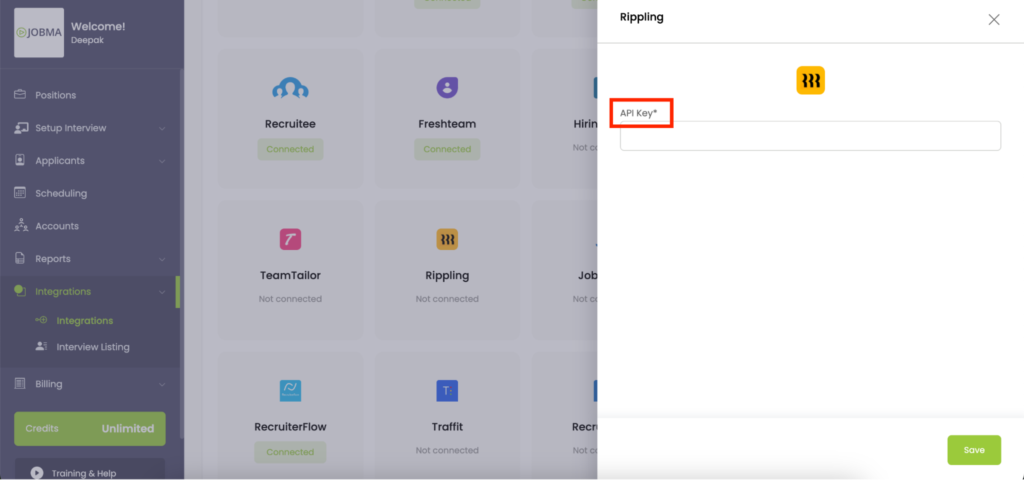
Step 3
You’ll need to insert the API Key here. Please contact your Rippling account manager for the key.
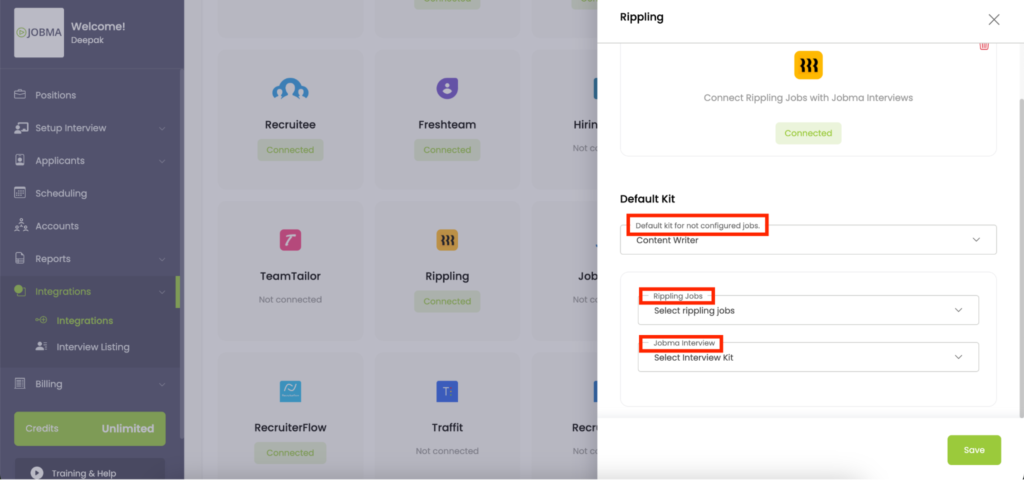
Step 4
Once the details are saved, click on Rippling (Under Integrations) and now associate Interview Kits with the Jobs (Synced from Rippling). Choose an Interview Kit and select a corresponding Job.
If you frequently hire for a specific Job, you can also select a default interview kit on the same page.
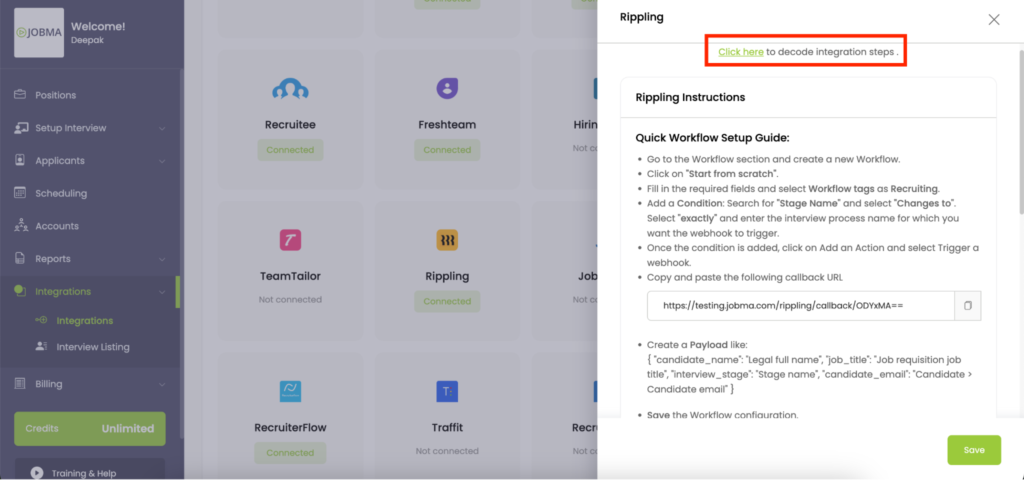
Step 5
Next, on the same page, you can find instructions for setting up workflows in Rippling by clicking on Click here to decode integration steps.
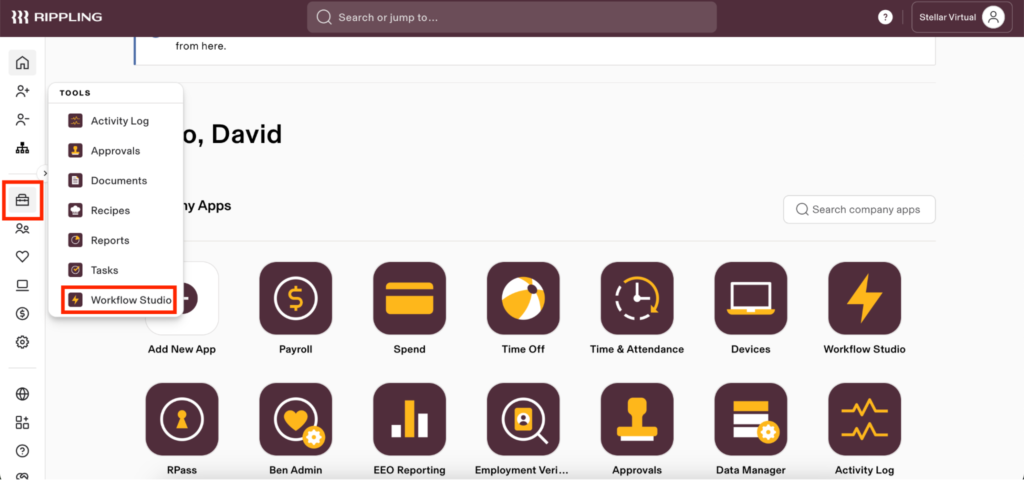
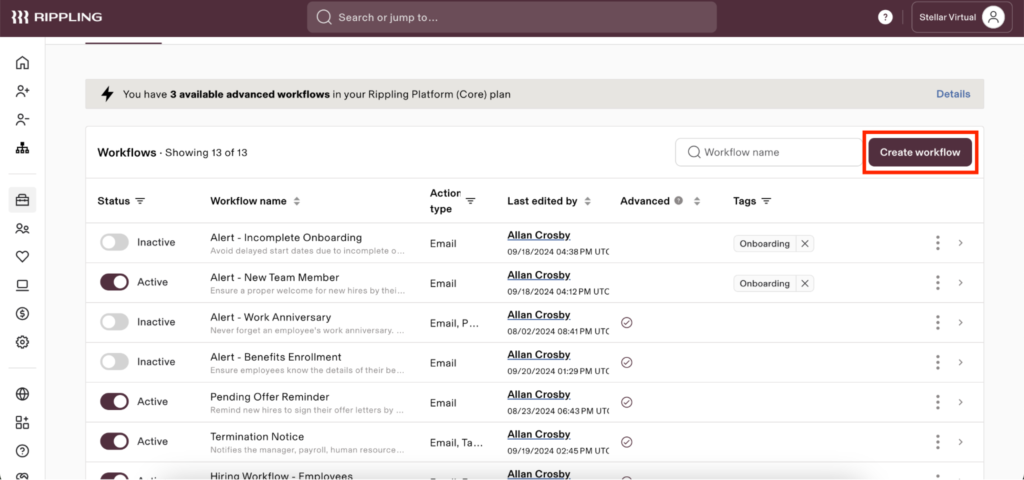
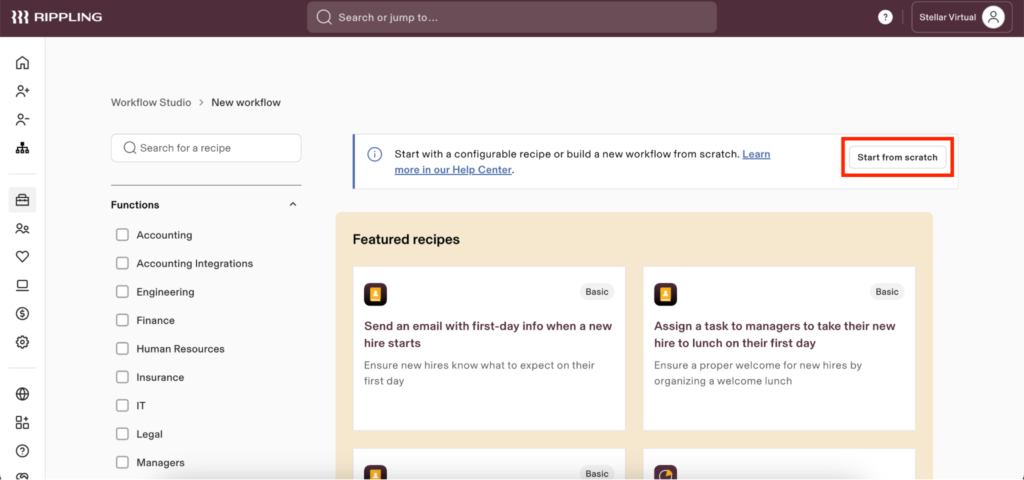
Step 6
Now, on your Rippling account, go to Tools > Workflow Studio. Click on Create Workflow, and then select Start from Scratch on the next page.
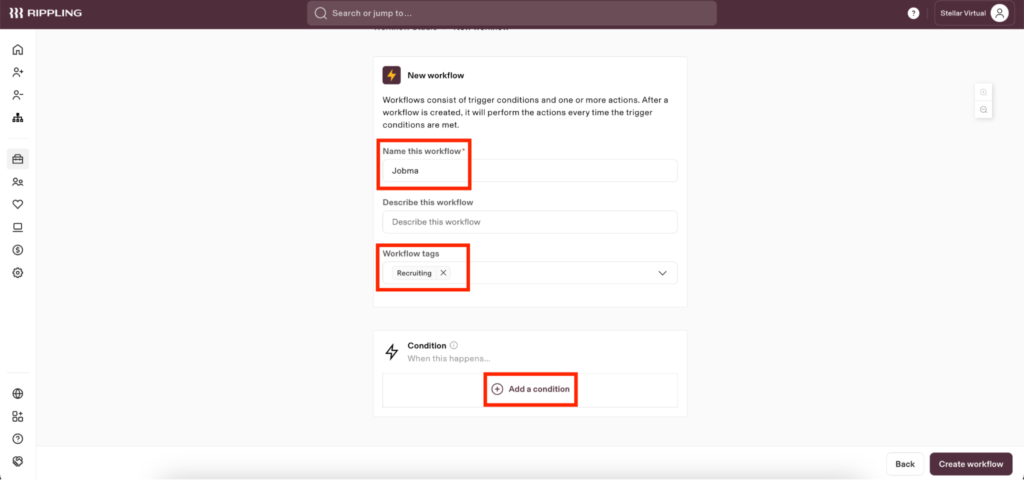
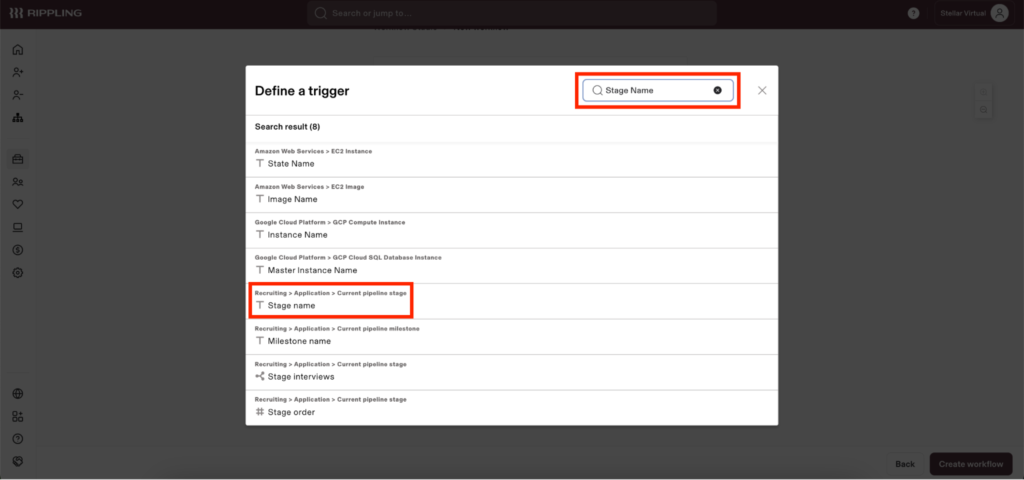
Step 7
Now, enter a name for the workflow and select Recruiting under workflow tags. Next, click on Add a Condition, search for Stage Name, and select it from the search results.
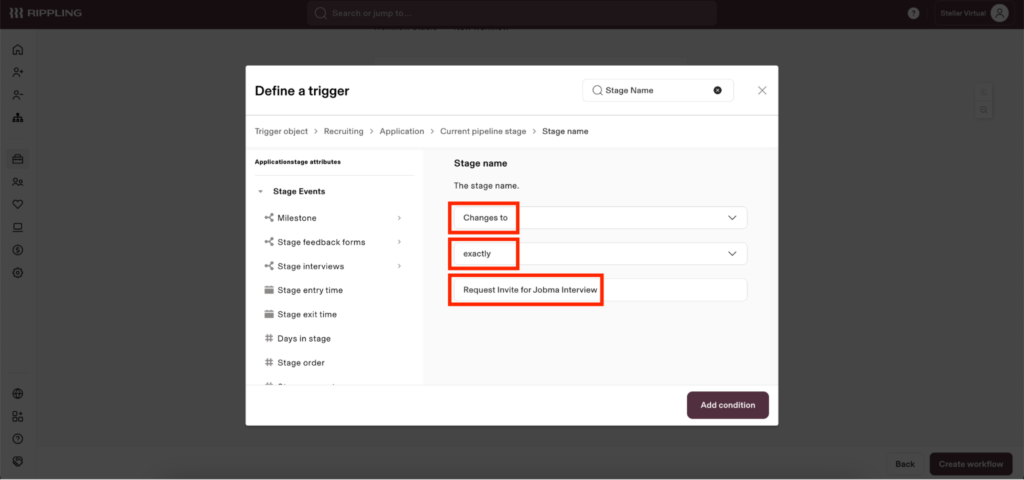
Step 8
On the next screen, select Changes to for the first row, exactly for the second row, and enter the name of the interview process for which you want the webhook to trigger in the third row and click on Add condition.
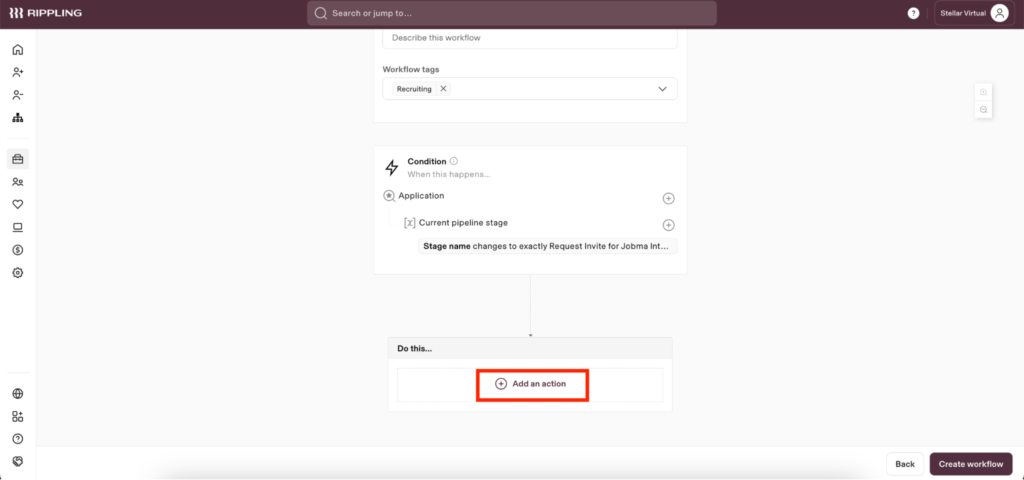
Step 9
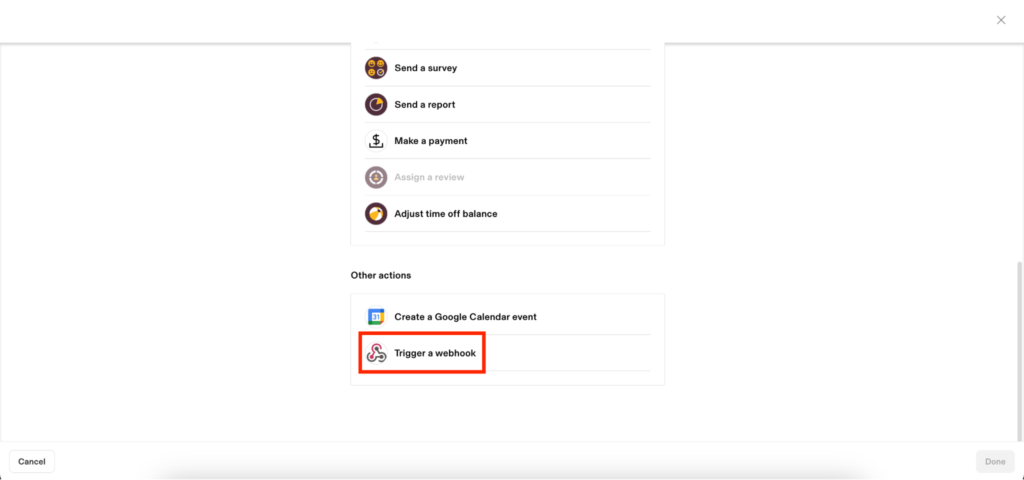
Once done, click on Add an action and select Trigger a webhook.
Step 10
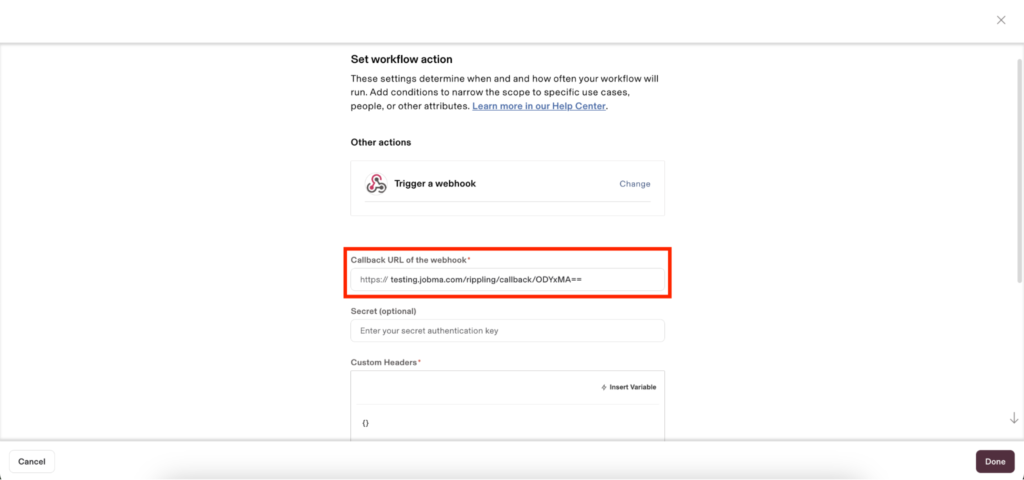
On the next screen, enter the Callback URL and JSON Payload (available on Jobma under integration steps).
Step 11
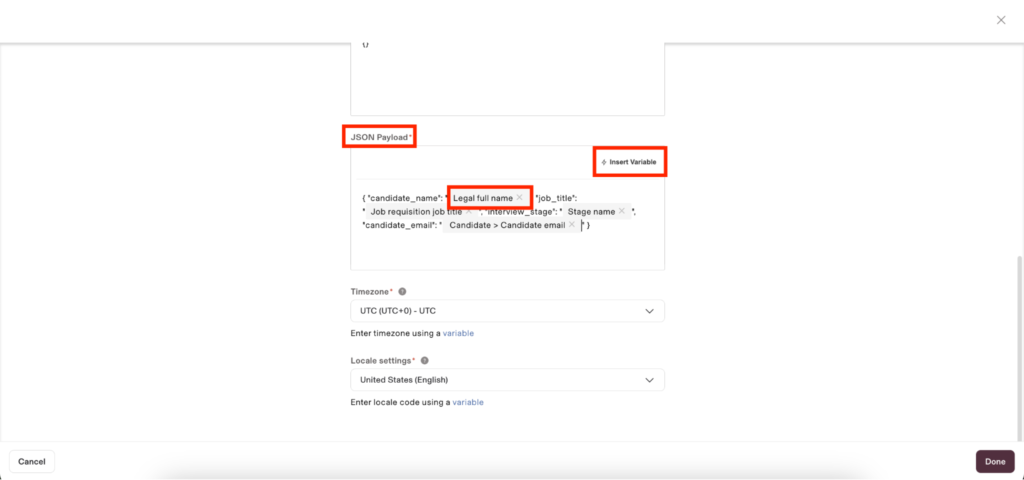
Under JSON Payload, you’ll need to replace the text “Legal Full name,” “Job requisition job title,” “Stage name,” and “Candidate>Candidate email” with the corresponding variables.
Step 12
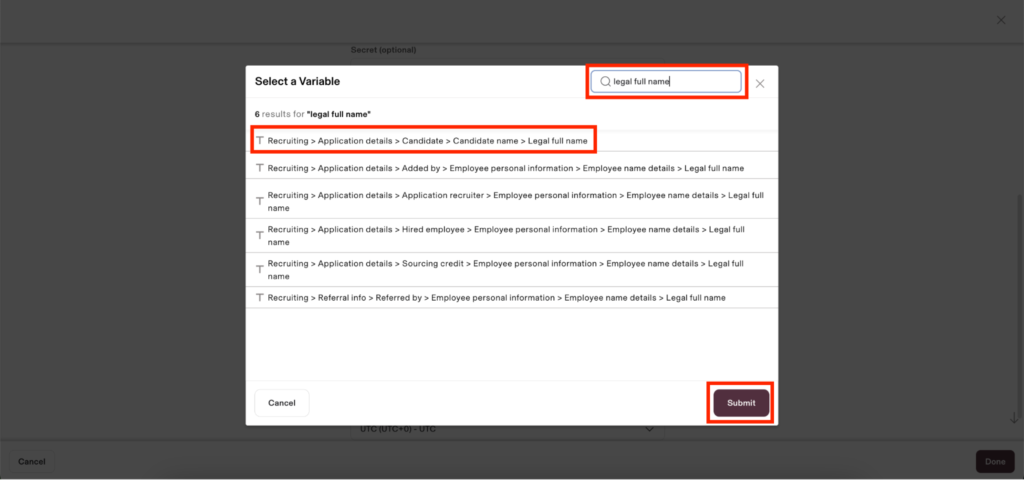
To replace text with a variable, copy the text and click on Insert Variable. Then, paste the text and select the relevant option from the results. Repeat this step for all the texts.
Once done, click on Submit and then Create Workflow. You have now successfully configured your Jobma and Rippling accounts.
Step 13
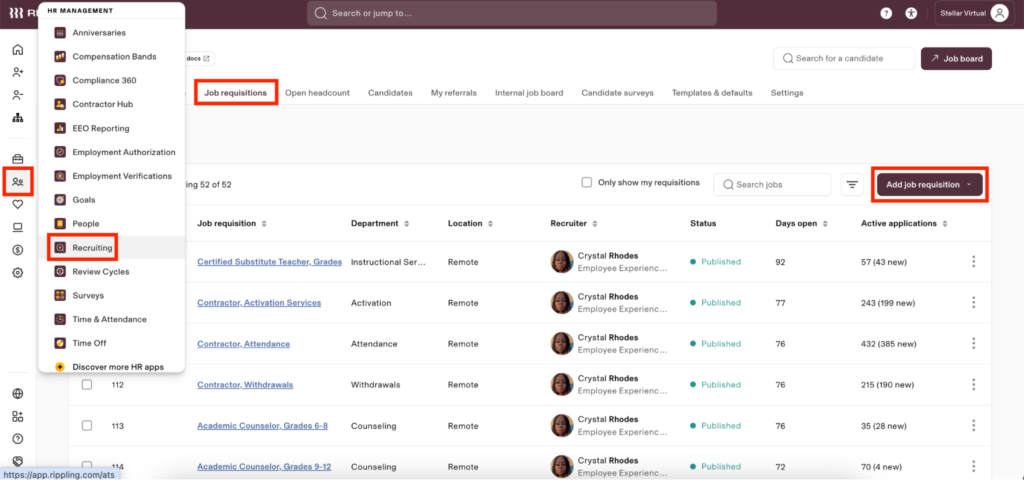
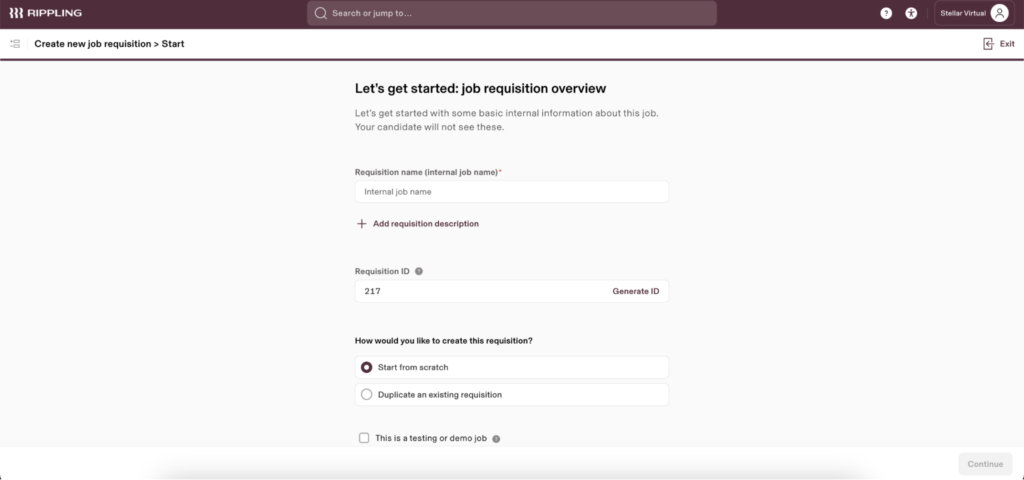
Now, it’s time to invite candidates for Jobma interviews. Within Rippling, access the
Recruiting > Job requisitions section. Here, you can either add a new Job or select an existing
one. If adding a new Job, provide the necessary details and Save the information.
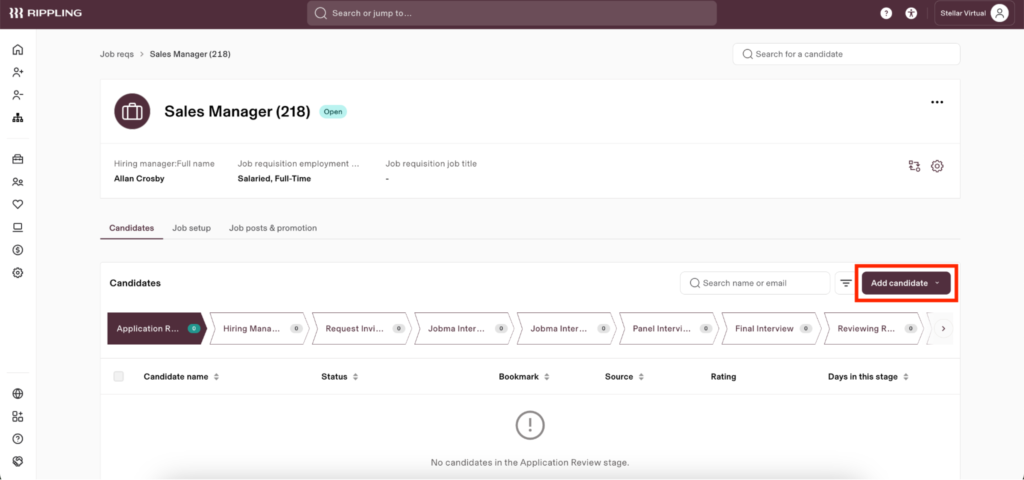
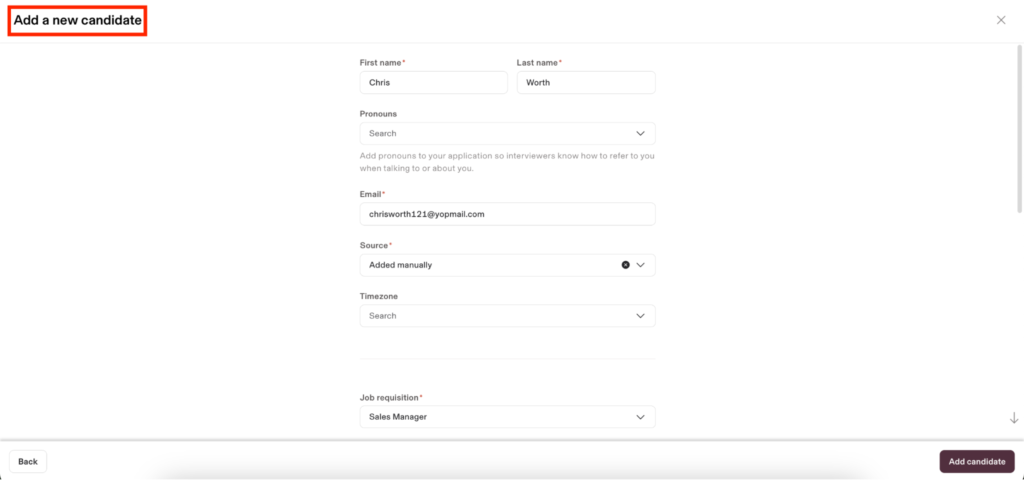
Step 14
Now, open the job requisition. You can either add a new candidate or select an existing one. If you’re adding a new candidate, enter the details and save the information.
Step 15
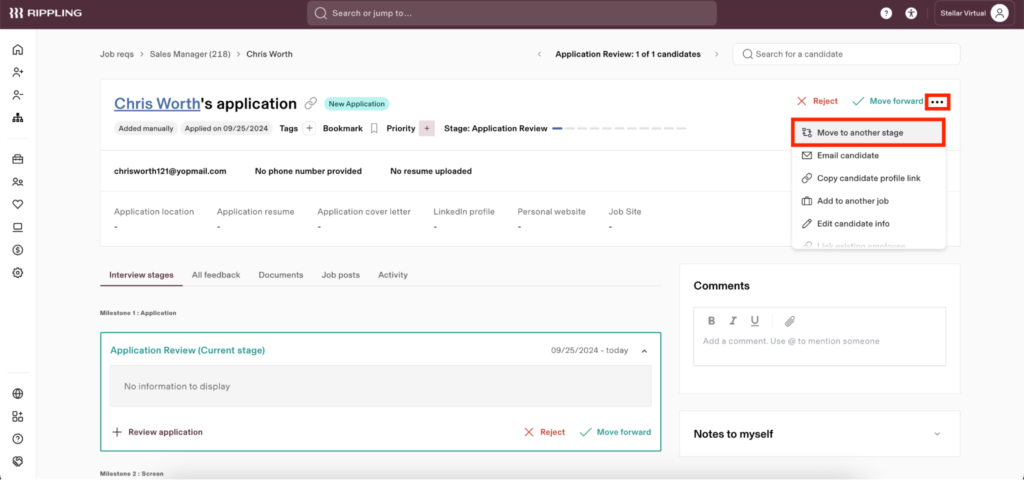
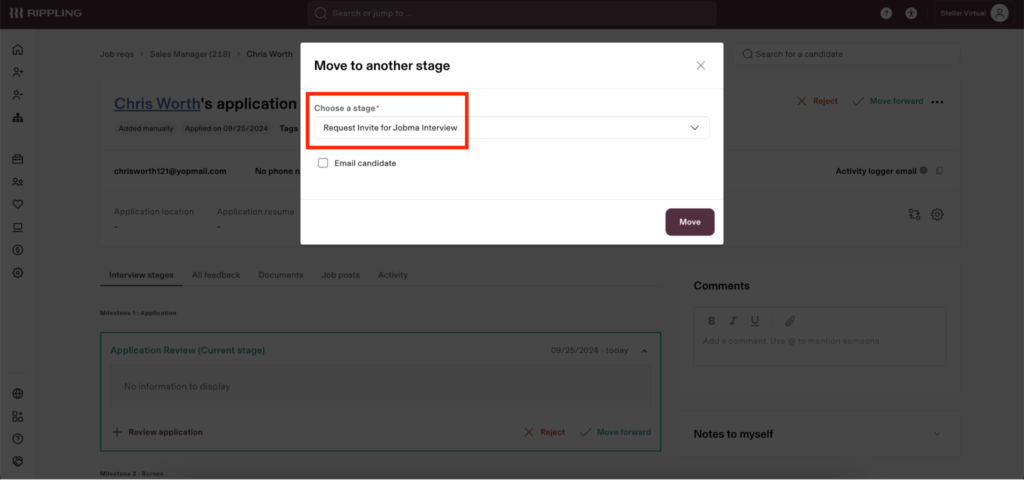
Open the candidate profile, click on the three dots, and select Move to Another Stage. On the next page, choose the interview process you set up earlier for the interview trigger.
Note: It may take up to one hour for the webhook to trigger and schedule the Jobma interview.
Step 16
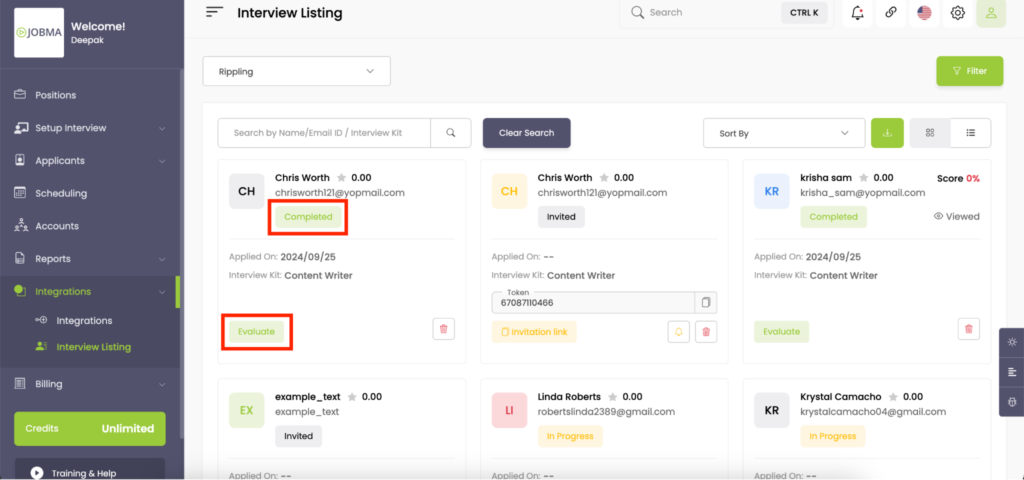
You can check the status of the interview invitation in your Jobma account by navigating to Integrations > Interview Listing and selecting Rippling.

Step 17
Once the candidate completes the interview, the invited status will change to Completed. You can click on the Evaluate button to view the interview results.
That’s it! If you have any questions or need help, please reach out to your Jobma support representative.